|
|
|
Who's Online
There currently are 5853 guests online. |
|
Categories
|
|
Information
|
|
Featured Product
|
|
|
 |
|
|
There are currently no product reviews.
 ;
I'm very satisfied with my purchase. It resolved my problem. Owner-manuals.com is a very very good place.
Thank you!
 ;
Veramente completo, dettagliato e perfetto nella visione. Perfect, thanks!
;
Fully functional usable service manual. Considering the age of the manual and device quality was better than expected
;
Thank you very much, I've been very happy to find this manual on "Owner Manual". It's a perfect copy and it has been really useful for my work!
;
It took about 24-hours after my payment before I was able to get to the download. Apparently, payment processing is not 100% automated. That is no big deal, just be aware of that going in.
After I got to it, it was in good shape, easy to read, etc. Not some cheap FAX copy looking thing.
Also, this site was the cheapest I found. Another Plus!
TAPE DECK ADJUSTMENTS
1. HEAD REPLACEMENT
� After replacement, demagnetize the heads by using a degausser. � Be sure to clean the heads before attempting to make any adjustments. � All wiring should be returned to the original position after work is completed.
2. HEAD AZIMUTH ADJUSTMENT
(1) Load the test tape(VTT-703, etc., 10 kHz) for azimuth adjustment. (2) Press the PLAY button. (3) Use a cross-tip screwdriver to turn the screw for azimuth adjustment so that the left and right output are maximized. (4) Press the STOP button. (5) After completion of the adjustment, use thread lock(TB-1401B) to secure the azimuth-adjustment screw.
3. AC BIAS FREQUENCY ADJUSTMENT
(1) Connect counter to T201(BS). (2) R/P switch in recording state. (3) Adjustment T801 a plastic screw , AC bias frequency : 80 kHz.
4. MOTOR SPEED ADJUSTMENT
(1) Insert the test tape(TCC-119, etc., 3,000 Hz). (2) Press the PLAY button. (3) Use a flat-tip screwdriver to turn the SVR(located inside the rear of the motor) to adjust SVR so that the frequency counter become 3,000 Hz.
5. CHECKING THE MECHANISM TORQUES AND TENSION
� Clean the head, capstan and pinch roller before making any measurement.
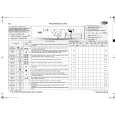
Measurement Cassette for measurement PLAY F.FWD REW Take-up torque PLAY : TW-211A F.FW/REW : TW-2231 30 - 60 gr.cm 55 - 120 gr.cm. 55 - 120 gr.cm. Back tension PLAY : TW-2111A 2.0 - 4.5 gr.cm --------Tape tension Drive-power cassete TW-2412 60 gr or more. ---------
This is a basic adjustment.
IC BLOCK DIAGRAM & DESCRIPTION
IC903 LA6541D(CD Driver)
Vcc 24 Vref 23 11k VIN4 22 VG4 21 Vo8 20 Vo7 19 Vcc GND Vo6 18 Vo5 17 VG3 16 11k VIN3 15 CD 14 RES 13
Level Sift
BTL Driver
BTL Driver
Level Sift
RESET
Level Sift
BTL Driver
BTL Driver
Level Sift
Regulator
11k 1 Vcc 2 Mute 3 VIN1 4 VG1 5 Vo1 6 Vo2 GND 7 Vo3 8 Vo4 9
11k 10 11 12
VG2
VIN2 Reg OUT Reg IN
-3-
|
|
|
> |
|